Tuesday, October 2, 2012

Guardian Angel gets a Day of the Dead Makeover

For a while now, I've been on the prowl for statues in need of a new look. Here are a couple of projects that have led to this obsession. They are obviously awesome.

Day of the Dead Lady Statue

Day of the Dead Holy Family

Well, I finally came across a statue piece that met my criteria for a similar project (because imitation is the sincerest form of flattery): a bisque Guardian Angel overlooking a pair of children dressed like they just stepped out Hansel and Gretel. At just $2, it was free of chips and imperfections (which  is rare for delicate pieces that make it to thrift stores). YOU ARE MINE. I WILL MAKE YOU BEAUTIFUL!

A few quick (but poor) shots of the statue in it's original state:


First step was to give the piece a good once-over with a compressed air can (goodbye, dust!) and sketch on some detail ideas with a pencil.


I initially had this foolish idea that I was going to do detailed work all over like the "Holy Family." I quickly realized that not only is it going to take multiple coats of paint, but there are way too many small areas where I won't be able to paint without messing up some other area or missing spots entirely.

The solution? Give the whole thing at least once coat of black. This will fill in all the dark nooks and crannies that I won't be able to repaint later in detail. 


In hindsight, I should have given the whole thing a coat of primer before getting started. The bisque is soaking up my acrylics like crazy, which is making me have to do MANY coats before even touching the detail. Unfortunately, I was having one of those impulsive moments and didn't follow proper procedures.

DUURRRR.

I'll add pictures as I make more progress!

Monday, September 17, 2012

I am not dead yet!

Hey everyone!

Yup, it’s been a while since I've updated this place. I’ve been helping my friend Ashley get ready for her wedding since October 2011 by making all sorts of craftiness. Now that the big day has passed and she’s happily married, I can rededicate my free energy to my own crafty vices. 

This will come in the form of yarns (knitting, crochet), clay (now that I’ve taken a few classes and have access of a studio), repurposing items, and anything else that strikes my fancy. I’ve got a lot of supplies built up from thrift store adventures, so it’s about time for me to put them to use!

I want to make note that everything I do is restricted by budget. Like many other crafty people, I often find myself wanting to emulate high-end style without the high-end price tag. I also live in a house with 2 dogs, 4 cats and a very rambunctious girl on the verge of turning 3, so I live in a constant state of “This is why we can’t have nice things!” I don’t list the husband in that scenario because he’s quite good at not drawing on the walls or puking on the floor (I’ll let you assign those behaviors to who you believe would be the appropriate guilty party). 

Anyway, this is just a heads up that I am not dead (queue Monty Python skit) and I will be updating shortly with new adventures (and misadventures) in DIY. Thanks!

Sunday, May 6, 2012

Tea Table Turned Chess Table

I spotted this little table for $10 at the thrift store and the cabriole legs were just irresistible! I’m such a sucker for anything Queen Anne. Here she is playing a little game of footsie with my distressed Japanese compartment bench and my piano bench-in-progress.


The major imperfection was a scary looking chip in the corner lip of the table top. Not a crack... a chunk! Spells death to furniture in the resale world. To me it spells DEAL. (And "SQUEE!")

Fortunately for this sexy little lady, I had just seen an awesome tutorial in my Handyman Magazine on how to repair such damage using a little wood epoxy. Muahahahaha!
 
Anyway, I saw it and immediately thought of making it into a chess table like this one. Obviously I’m not too keen on paying hundreds of dollars for a table that will occasionally be the site of a severe ass-whooping (of which I will not be dealing). But a piece of $10 misfit furniture and a few supplies would make quite the cute little piece for my home.

Here are some “before” shots highlighting the damages. 
Note the scuffing and ring stains on the top.


The missing corner.

The scuffed feet.
 
During inspection I found the birth certificate. 


A little more internet dredging helped me find out about the James River collection through Hickory Chair Company. This end table is actually a discontinued model of a Queen Anne slipper foot tea table. A similar table still available through third parties runs nearly $800. That one has carved shells on the side and a hidden drawer underneath, but you get the point. At some point, this was a damn nice table.

 
FOR ONCE, I decided to work on this piece the way you’re supposed to. First, I gave it a quick once-over with some soapy water and a paper towel. I should really do that every time I start a piece (like the piano bench), but I get far too excited and jump right into painting. That being said, THIS IS WHY YOU SHOULD WASH THE WOOD. Gross. 

 
After a bath, it was time to repair the major imperfections. Kwikwood is your friend. Heed their suggestion to keep your fingers damp while working with the epoxy. I had a little bowl of water beside me to dip in hands in when needed. If your fingers get dry, the tacky epoxy will stick to your fingers and really piss you off. A hand washing with soap after you’re finished will remove any residue from your hands. My only real challenge was keeping Oz from putting his big face on it while I was working.

 
All puttied up! 

 
Oz, realizing that wood epoxy is not a good food choice, had lost interest by this point and was watching TV instead. 
 
After an hour, the epoxy is fully set and ready to be sanded or painted. It sands pretty easy (compared to wood), so be careful not to overdo it. My corner isn’t perfect, but it’s functional. I didn’t epoxy the damaged on the middle of the side scallops, but that should be masked pretty well with paint.


Cleaned. Repaired. Time to paint! Well, prime. I decided to use a white primer because the initial plan was to paint it black and then distress it down to the white coat. But upon discussing it with my husband, I'm going to give a couple coats of Behr's "Bison Brown" and then cover it in black. Then I'll distress it down to the brown to give an illusion of paint flecking off bare wood.

Okay, I went with idea #2. I put 2-3 coats of Bison Brown on the primer, then 2-3 coats of black over the brown.

Brown:
Black:

THEN I distressed the paint jobs using a sandpaper block and the flat blade of a scraper. The sandpaper is good for broad, sharp edges like the corners and edges. The scraper is idea for small spaces and tiny accents.


 Note the Mojo on the couch.

Next,  it was time to stencil the chess board into the tabletop. I had to shrink the regulation size 2"x2" square to a 1.75"x1.75" square so that it would fit on the table. After a lot of frustration of "it's not QUITE right" lines, I finally had it all gridded out.


To end the night, I did a quick color-coding of the board so that I don't mess it up later.


Now will be the horribly tedious task of painting the chess board. I predict at least 3 coats per square.

Friday, April 13, 2012

Tessa's Toy Box of Holding

I have a kid. A very playful 2 year old. This means I have toys. Lots of toys.

And I have a Rottweiler. A very mouthy 3 year old. This means nothing is safe. Nothing.

Two problems, one simple solution: A TOY BOX!

Third problem: Finding a toy box at a reasonable price that is an acceptable size (not a hope chest but not a shoe box) and decent quality (somewhere between compressed particle board and hardwood).

After a few months of watching my local Habitat for Humanities store, I came across this little chest. It's handmade, which I liked. It's sturdy, which I needed. And it was only $35, which I loved. And the added bonus- It fit in the back of my Echo, so I could get it home without stealing my husband's car!

With cans of primer and paint in hand, I rolled out the tarp and got started. Of course, I was way too excited and forgot to take a "before" picture. Let's just say it's got some rough spots and the paint job was very beat up.


The entire thing was bright blue while the lid was white. It really needed a facelift.


I decided on Rustoleum "Lagoon" in satin finish for the box. I actually start to run out of Lagoon before getting to the lid and bottom (which actually comes out of the box) so I grabbed an old can of Valspar "Black" gloss finish to do those sections. The Lagoon looks very blue in these pictures, but it's actually very teal. Whatever, it looks right in person.


I was horribly impatient about waiting for coats to dry so there were a few minor mishaps. But overall, the box looks great and now all of Tessa's stuffed animals are safe from the nomming jaws of Oz, a.k.a. Bo-Bo.

Tuesday, March 27, 2012

Thrift Scores: March 27, 2012

This kind of entry is to show off the little things I pick up. Not everything, just the gems. The quirky little items and killer finds that I couldn't pass up.

First, a little piece of art. Hand-made, signed by the artist. The flower is either painted or etched into the metal plate and then mounted onto slate. A bit pricey at $8, but worth it to own such a unique piece.


Here it is enjoying its new home next to the re-purposed shutter.


Next is this odd little tricycle. No, the pedals don't move (I was sad, too). But it was super sturdy and in great condition, except for the dust. For $2, it's got a new home with me!


Wheelie time!


And the prize of the day? Why, a big $4 ceramic rooster head, of course! I'm slowly driving MJ insane with every farm animal I manage to slip into our kitchen. So of course I would score my most hilarious item while he's out of town on business.


None shall escape the gaze of the judgmental rooster.


Monday, March 26, 2012

Raspberry Mousse Piano Bench

I'm going to try something new. Partially because I'm curious to see how this type of entry plays out and partially because I'm too impatient to wait until this project is finished.

I want to premise this entry by saying that I am NOT painting this piano bench hot pink. It's actually Behr's "Raspberry Mousse" which is much more purple fuschia than pink. However, my camera appears to be extremely intimidated by this pigment and therefore tried to make it appear a different shade.

 
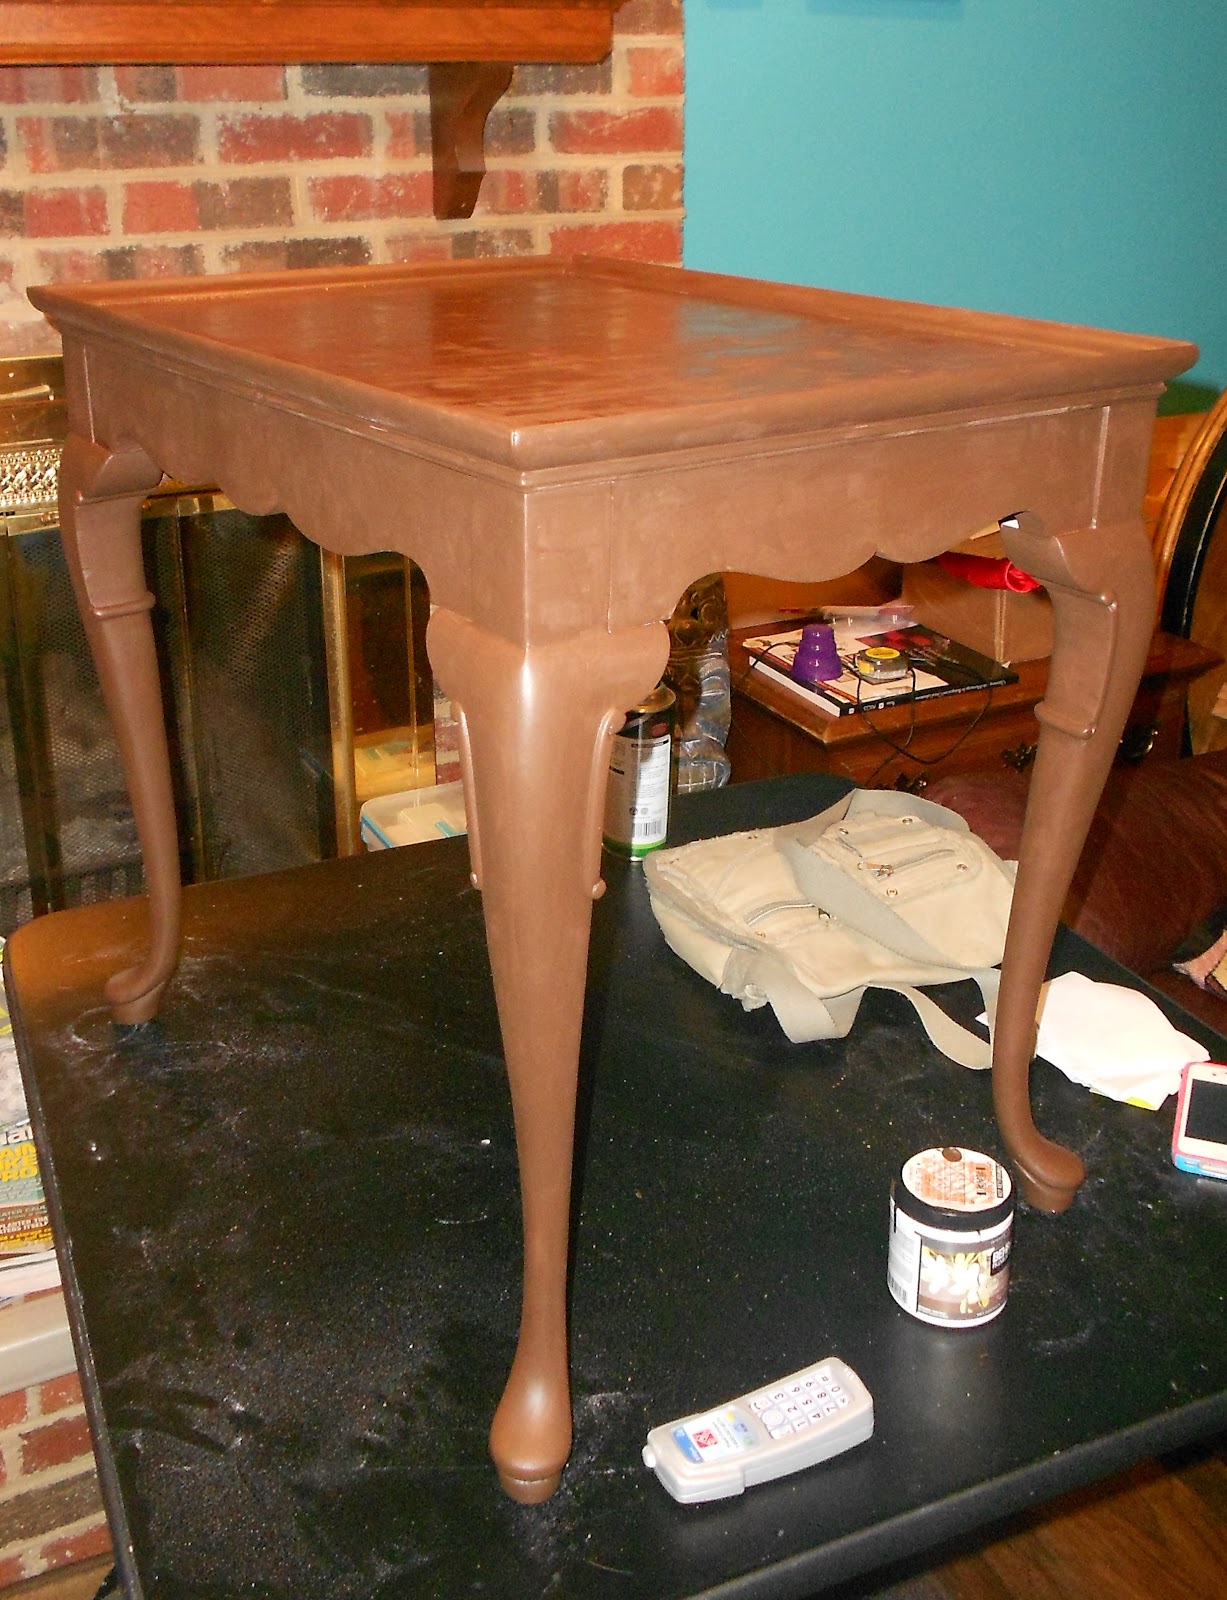
I picked up this piano bench a few months ago from the Habitat Restore for $35. There was a lot of scuffing on the top and there's a bit of damage on the underside, but the piece was just too gorgeous to pass up.


After removing the hinges and chains, the bench got a generous coat of primer. I decided not to sand out all the scuffs on the bench top and feet. I thought the battle scars would complement the smooth, intricate details on the legs.

Now, piano bench, step into my office... err... living room. Just get comfortable on that cheap fold-out table. You may be here for a while... (UPDATE: It lived there for several weeks.)

 
Oh my god, what was I thinking?! Given my hands-on mentality, I decided to HAND PAINT the bench. With a 2" foam brush and a narrow artist's brush to get all the grooves. Oh, what I do for the color I want. Spray paint would have been SO much easier. But no, I had to get my hands dirty and channel my inner perfectionist. (UPDATE: Dumbass.)


Even poor Dizzy seems exhausted after watching me work for a few hours. And this was BEFORE I picked up the narrow brush and started trying to fill in the grooves. I think I got a leg and a half done before I decided to call it a night. And by call it a night, I mean post this so I can vent about it. Such a labor of love.


Three-ish coats later and it's done! Well, kinda. Now it's time to take a crack at distressing/aging this thing. I had made no previous attempts at this, so I decided to start on the inside (which almost no one will ever see). Just mixed up 3 parts black paint with 1 part water.

 
Okay, here's my first tip to everyone. If you're going to only try and age the edges and corners, WIPE QUICKLY with a clean cloth. If you hesitate, it will sink into the first layer of paint and create a distinct line.  You should probably wear gloves, but I hate wearing gloves. So I had black fingers by the end of this. It's okay, they didn't fall off.

Also... once you paint/wipe an area, LEAVE IT ALONE. If you try to go back for touch ups, you're just going to pull off your second color and leave very distinct edges. Trust me on this one...


In the middle of this crash course in "How NOT to do an antique/distressed paint job," I kinda panicked and decided to rub the whole surface rather than just along the edges, grooves and corners. This creates an effect similar to the effect you get from painting a second paint color on top of the first and then gently sanding the surface until the first color shows through.


Anyway, I stayed committed and eventually finished the distressing coat. I had work on it on three different nights (two to finish, one to touch up). Lots of black under my fingernails.


Since I painted/wiped all surfaces rather than just the edges, I had to learn to commit to a direction. Since I used the inside as my 'trial by fire' moment, the lid turned out pretty damn well! It's very reminiscence of wood grain.


Final stage: SEALING! I picked up Rustoleum Clear Gloss to protect my work and really make those nooks and crannies POP. This picture gives you an idea of how much a gloss coating makes (glossed on left, unsprayed on right). The gloss remains tacky for 48-72 hours, so I had to wait to flip it over and do the underside and the other side of the lid.
 

OH SNAP, people, it's done!!!! After multiple coats of gloss and a lengthy drying/curing period. After putting the hardware on wrong TWICE (different screw lengths at different spots, two different chain lengths). After waiting and waiting for a day when I could pull the thing outside and get pictures. Try to ignore the glare. I was kind of winging it on the photos before it started to rain.


Close up of the top:


 Say "AHHH."


Sexy legs.


The black antiquing really brings out the details.


One more shot. Now to move it up into my craft room in the attic, where it will never again see the light of day. C'est la vie.