I spotted this little table for $10 at the thrift store and the cabriole
legs were just irresistible! I’m such a sucker for anything Queen Anne. Here
she is playing a little game of footsie with my distressed Japanese compartment
bench and my piano bench-in-progress.

The major imperfection was a scary
looking chip in the corner lip of the table top. Not a crack... a chunk! Spells
death to furniture in the resale world. To me it spells DEAL. (And
"SQUEE!")
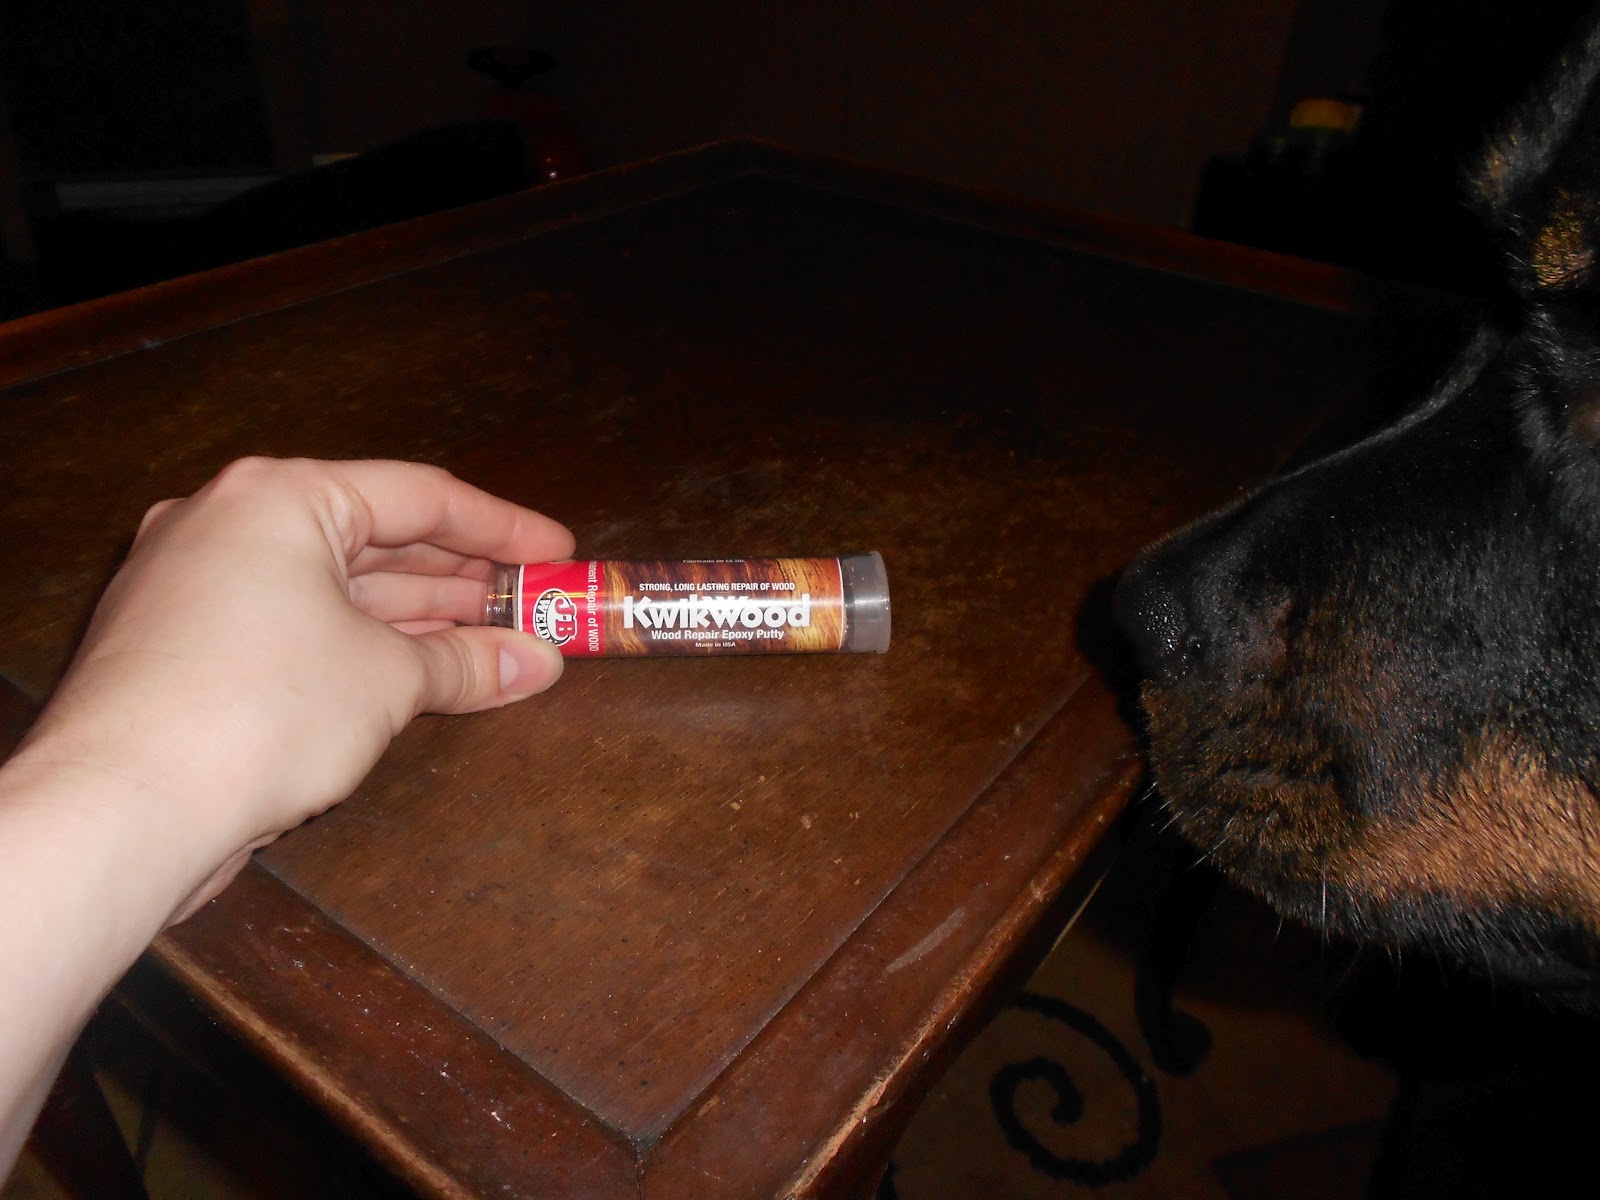
Fortunately for this sexy little lady, I had just seen an awesome tutorial
in my Handyman Magazine on how to repair such damage using a little wood epoxy.
Muahahahaha!
Anyway,
I saw it and immediately thought of making it into a chess table like this one.
Obviously I’m not too keen on paying hundreds of dollars for a table that will occasionally
be the site of a severe ass-whooping (of which I will not be dealing). But a piece
of $10 misfit furniture and a few supplies would make quite the cute little
piece for my home.

Here are some “before” shots highlighting the damages.
Note the scuffing and
ring stains on the top.

The missing corner.

The scuffed feet.

During inspection I found the birth certificate.

A
little more internet dredging helped me find out about the James River
collection through Hickory Chair Company. This end table is actually a
discontinued model of a Queen Anne slipper foot tea table. A similar table
still available through third parties runs nearly $800. That one has carved shells
on the side and a hidden drawer underneath, but you get the point. At some
point, this was a damn nice table.

FOR ONCE, I decided to work on this piece the way you’re supposed to. First,
I gave it a quick once-over with some soapy water and a paper towel. I should
really do that every time I start a piece (like the piano bench), but I get far
too excited and jump right into painting. That being said, THIS IS WHY YOU
SHOULD WASH THE WOOD. Gross.

After a bath, it was time to repair the major imperfections. Kwikwood is
your friend. Heed their suggestion to keep your fingers damp while working with
the epoxy. I had a little bowl of water beside me to dip in hands in when
needed. If your fingers get dry, the tacky epoxy will stick to your fingers and
really piss you off. A hand washing with soap after you’re finished will remove
any residue from your hands. My only real challenge was keeping Oz from putting
his big face on it while I was working.
All puttied up!


Oz, realizing that wood epoxy is not a good food choice, had lost interest
by this point and was watching TV instead.

After an hour, the epoxy is fully set and ready to be sanded or painted. It
sands pretty easy (compared to wood), so be careful not to overdo it. My corner
isn’t perfect, but it’s functional. I didn’t epoxy the damaged on the middle of
the side scallops, but that should be masked pretty well with paint.

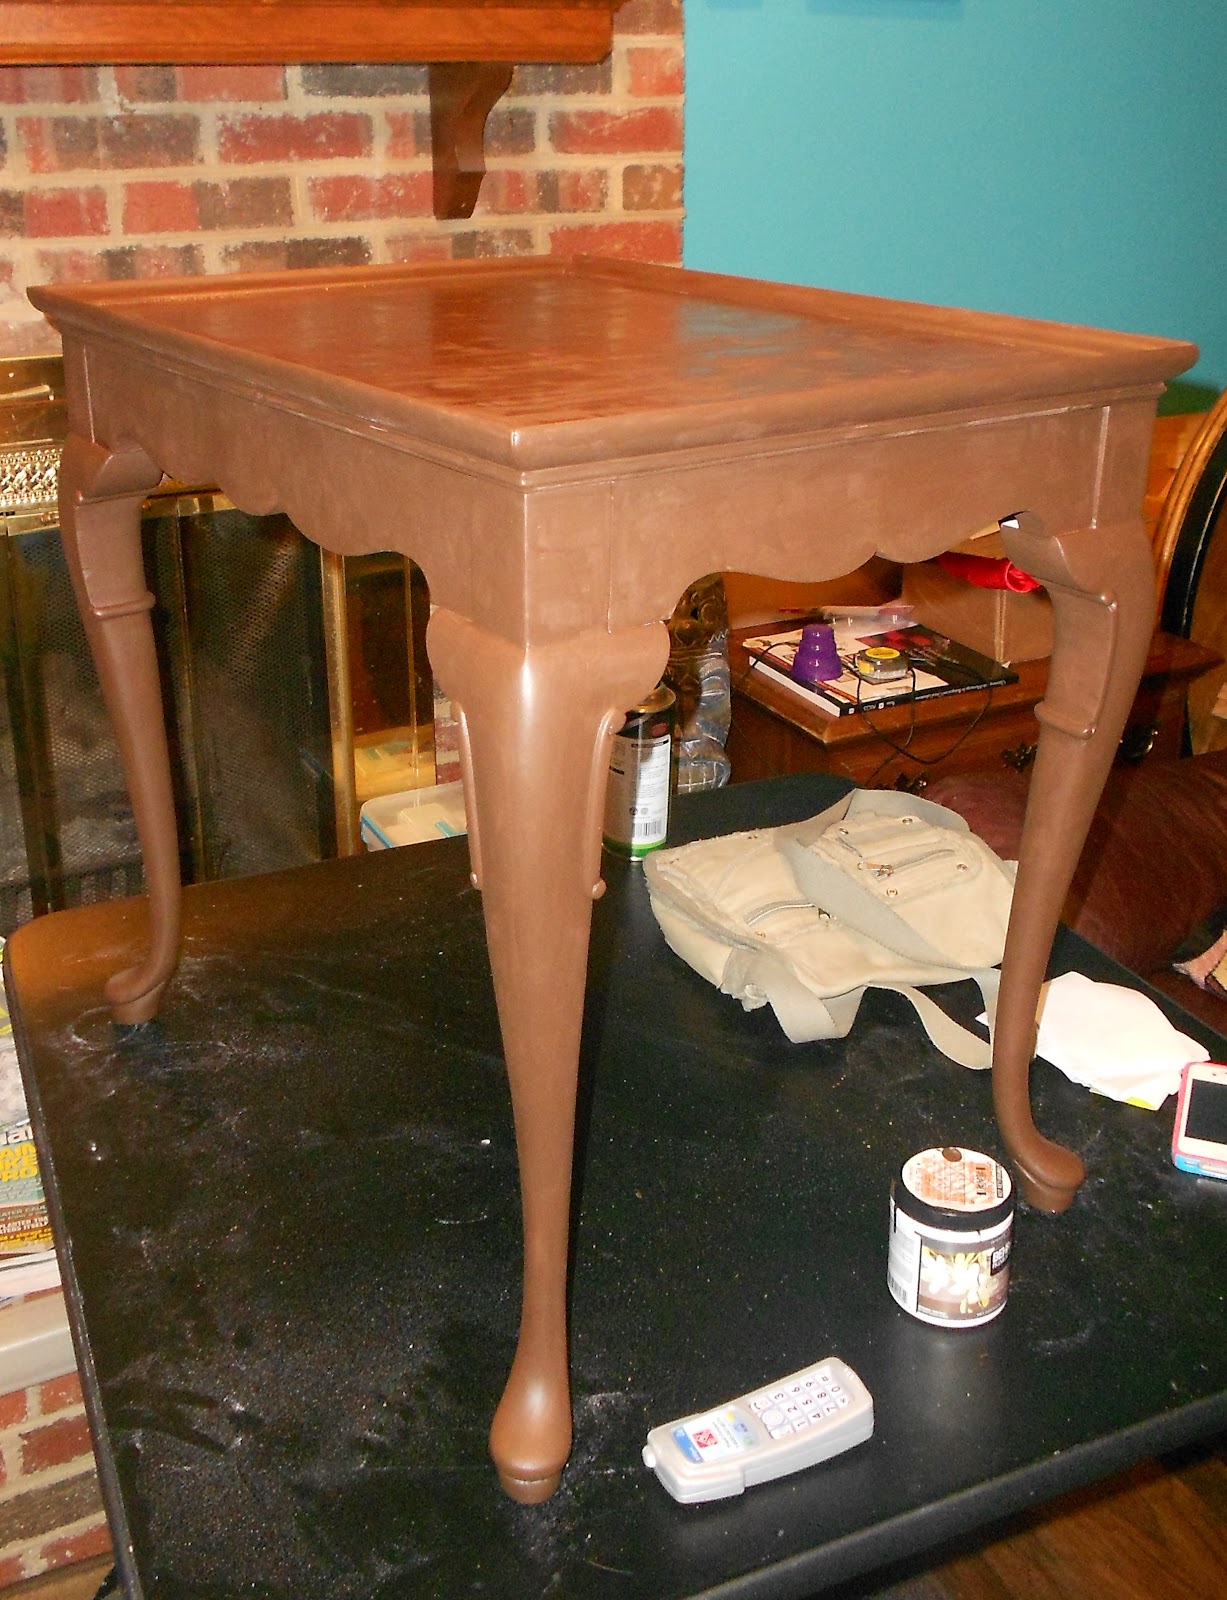
Cleaned. Repaired. Time to paint! Well, prime. I decided to use a white
primer because the initial plan was to paint it black and then distress it down
to the white coat. But upon discussing it with my husband, I'm going to give a couple coats of Behr's "Bison Brown" and then cover it in black. Then I'll distress it down to the brown to give an illusion of paint flecking off bare wood.

Okay, I went with idea #2. I put 2-3 coats of Bison Brown on the primer, then 2-3 coats of black over the brown.
Brown:
Black:

THEN I distressed the paint jobs using a sandpaper block and the flat blade of a scraper. The sandpaper is good for broad, sharp edges like the corners and edges. The scraper is idea for small spaces and tiny accents.


Note the Mojo on the couch.

Next, it was time to stencil the chess board into the tabletop. I had to shrink the regulation size 2"x2" square to a 1.75"x1.75" square so that it would fit on the table. After a lot of frustration of "it's not QUITE right" lines, I finally had it all gridded out.


To end the night, I did a quick color-coding of the board so that I don't mess it up later.

Now will be the horribly tedious task of painting the chess board. I predict at least 3 coats per square.