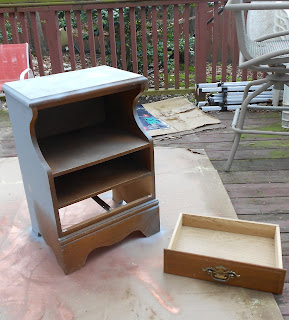
I'm going to try something new.
Partially because I'm curious to see how this type of entry plays out and
partially because I'm too impatient to wait until this project is finished.
I want to premise this entry by
saying that I am NOT painting this piano bench hot pink. It's actually Behr's
"Raspberry Mousse" which is much more purple fuschia than pink.
However, my camera appears to be extremely intimidated by this pigment and
therefore tried to make it appear a different shade.
I picked up this piano bench a few
months ago from the Habitat Restore for $35. There was a lot of scuffing on the
top and there's a bit of damage on the underside, but the piece was just too
gorgeous to pass up.
After removing the hinges and
chains, the bench got a generous coat of primer. I decided not to sand out all
the scuffs on the bench top and feet. I thought the battle scars would
complement the smooth, intricate details on the legs.
Now, piano bench, step into my
office... err... living room. Just get comfortable on that cheap fold-out
table. You may be here for a while... (UPDATE: It lived there for several weeks.)
Oh my god, what was I thinking?!
Given my hands-on mentality, I decided to HAND PAINT the bench. With a 2"
foam brush and a narrow artist's brush to get all the grooves. Oh, what I do
for the color I want. Spray paint would have been SO much easier. But no, I had
to get my hands dirty and channel my inner perfectionist. (UPDATE: Dumbass.)
Even poor Dizzy seems exhausted
after watching me work for a few hours. And this was BEFORE I picked up the
narrow brush and started trying to fill in the grooves. I think I got a leg and
a half done before I decided to call it a night. And by call it a night, I mean
post this so I can vent about it. Such a labor of love.
Three-ish coats later and it's
done! Well, kinda. Now it's time to take a crack at distressing/aging this
thing. I had made no previous attempts at this, so I decided to start on the
inside (which almost no one will ever see). Just mixed up 3 parts black paint
with 1 part water.
Okay, here's my first tip to
everyone. If you're going to only try and age the edges and corners, WIPE
QUICKLY with a clean cloth. If you hesitate, it will sink into the first layer
of paint and create a distinct line. You should probably wear gloves, but I hate wearing gloves. So I had black fingers by the end of this. It's okay, they didn't fall off.
Also... once you paint/wipe an area, LEAVE IT ALONE. If you try to go back for touch ups, you're just going to pull off your second color and leave very distinct edges. Trust me on this one...
In the middle of this crash course in "How NOT to do an antique/distressed paint job," I kinda panicked and decided to rub
the whole surface rather than just along the edges, grooves and corners. This creates an effect similar to the effect you get from
painting a second paint color on top of the first and then gently sanding the
surface until the first color shows through.
Anyway, I stayed committed and eventually finished the distressing coat. I had work on it on three different nights (two to finish, one to touch up). Lots of black under my fingernails.
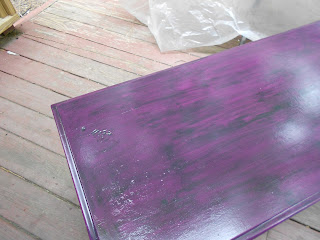
Since I painted/wiped all surfaces rather than just the edges, I had to learn to commit to a direction. Since I used the inside as my 'trial by fire' moment, the lid turned out pretty damn well! It's very reminiscence of wood grain.
Final stage: SEALING! I picked up Rustoleum Clear Gloss to protect my work and really make those nooks and crannies POP. This picture gives you an idea of how much a gloss coating makes (glossed on left, unsprayed on right). The gloss remains tacky for 48-72 hours, so I had to wait to flip it over and do the underside and the other side of the lid.
OH SNAP, people, it's done!!!! After multiple coats of gloss and a lengthy drying/curing period. After putting the hardware on wrong TWICE (different screw lengths at different spots, two different chain lengths). After waiting and waiting for a day when I could pull the thing outside and get pictures. Try to ignore the glare. I was kind of winging it on the photos before it started to rain.
Close up of the top:
Say "AHHH."
Sexy legs.
The black antiquing really brings out the details.
One more shot. Now to move it up into my craft room in the attic, where it will never again see the light of day. C'est la vie.
 First, a little piece of art. Hand-made, signed by the artist. The flower is either painted or etched into the metal plate and then mounted onto slate. A bit pricey at $8, but worth it to own such a unique piece.
 Here it is enjoying its new home next to the re-purposed shutter.
 Next is this odd little tricycle. No, the pedals don't move (I was sad, too). But it was super sturdy and in great condition, except for the dust. For $2, it's got a new home with me!
 Wheelie time!
 And the prize of the day? Why, a big $4 ceramic rooster head, of course! I'm slowly driving MJ insane with every farm animal I manage to slip into our kitchen. So of course I would score my most hilarious item while he's out of town on business.
 None shall escape the gaze of the judgmental rooster.


